
OINK
How we did the holes
I decided to do a quick writeup on the visual part of the main mechanic in the game because some people were showing interest. The explanation assumes some basic knowledge about shaders. More specifically Unity's shader node editor Shader Graph.
The mechanic in the game is that some surfaces in the disappear when lit by certain special lamps. Walls that are seemingly solid vanish allowing the player to walk through. Here is an example gif:
The effect is broken down into two parts.
The Light Volume
We put a spot ligh on the big lamp but were not completely satisfied with the looks. Sometimes it wasn't easy to see that the lamp was actually on, and it wasn't easy to mechanically parse the area of effect.
The solution was to build a cone shaped mesh and scale it to fit the bounds of the spotlight. We put a cool shader on the mesh which also communicates that the light is special and behaves differently from other light sources.
The shader is a simple unlit shader graph. It has a color and a noise texture property, the texture is sampled twice with UVs that offset differently with time. The blended texture sample is then multiplied with an inverted fresnel mask to fade it at the edges:
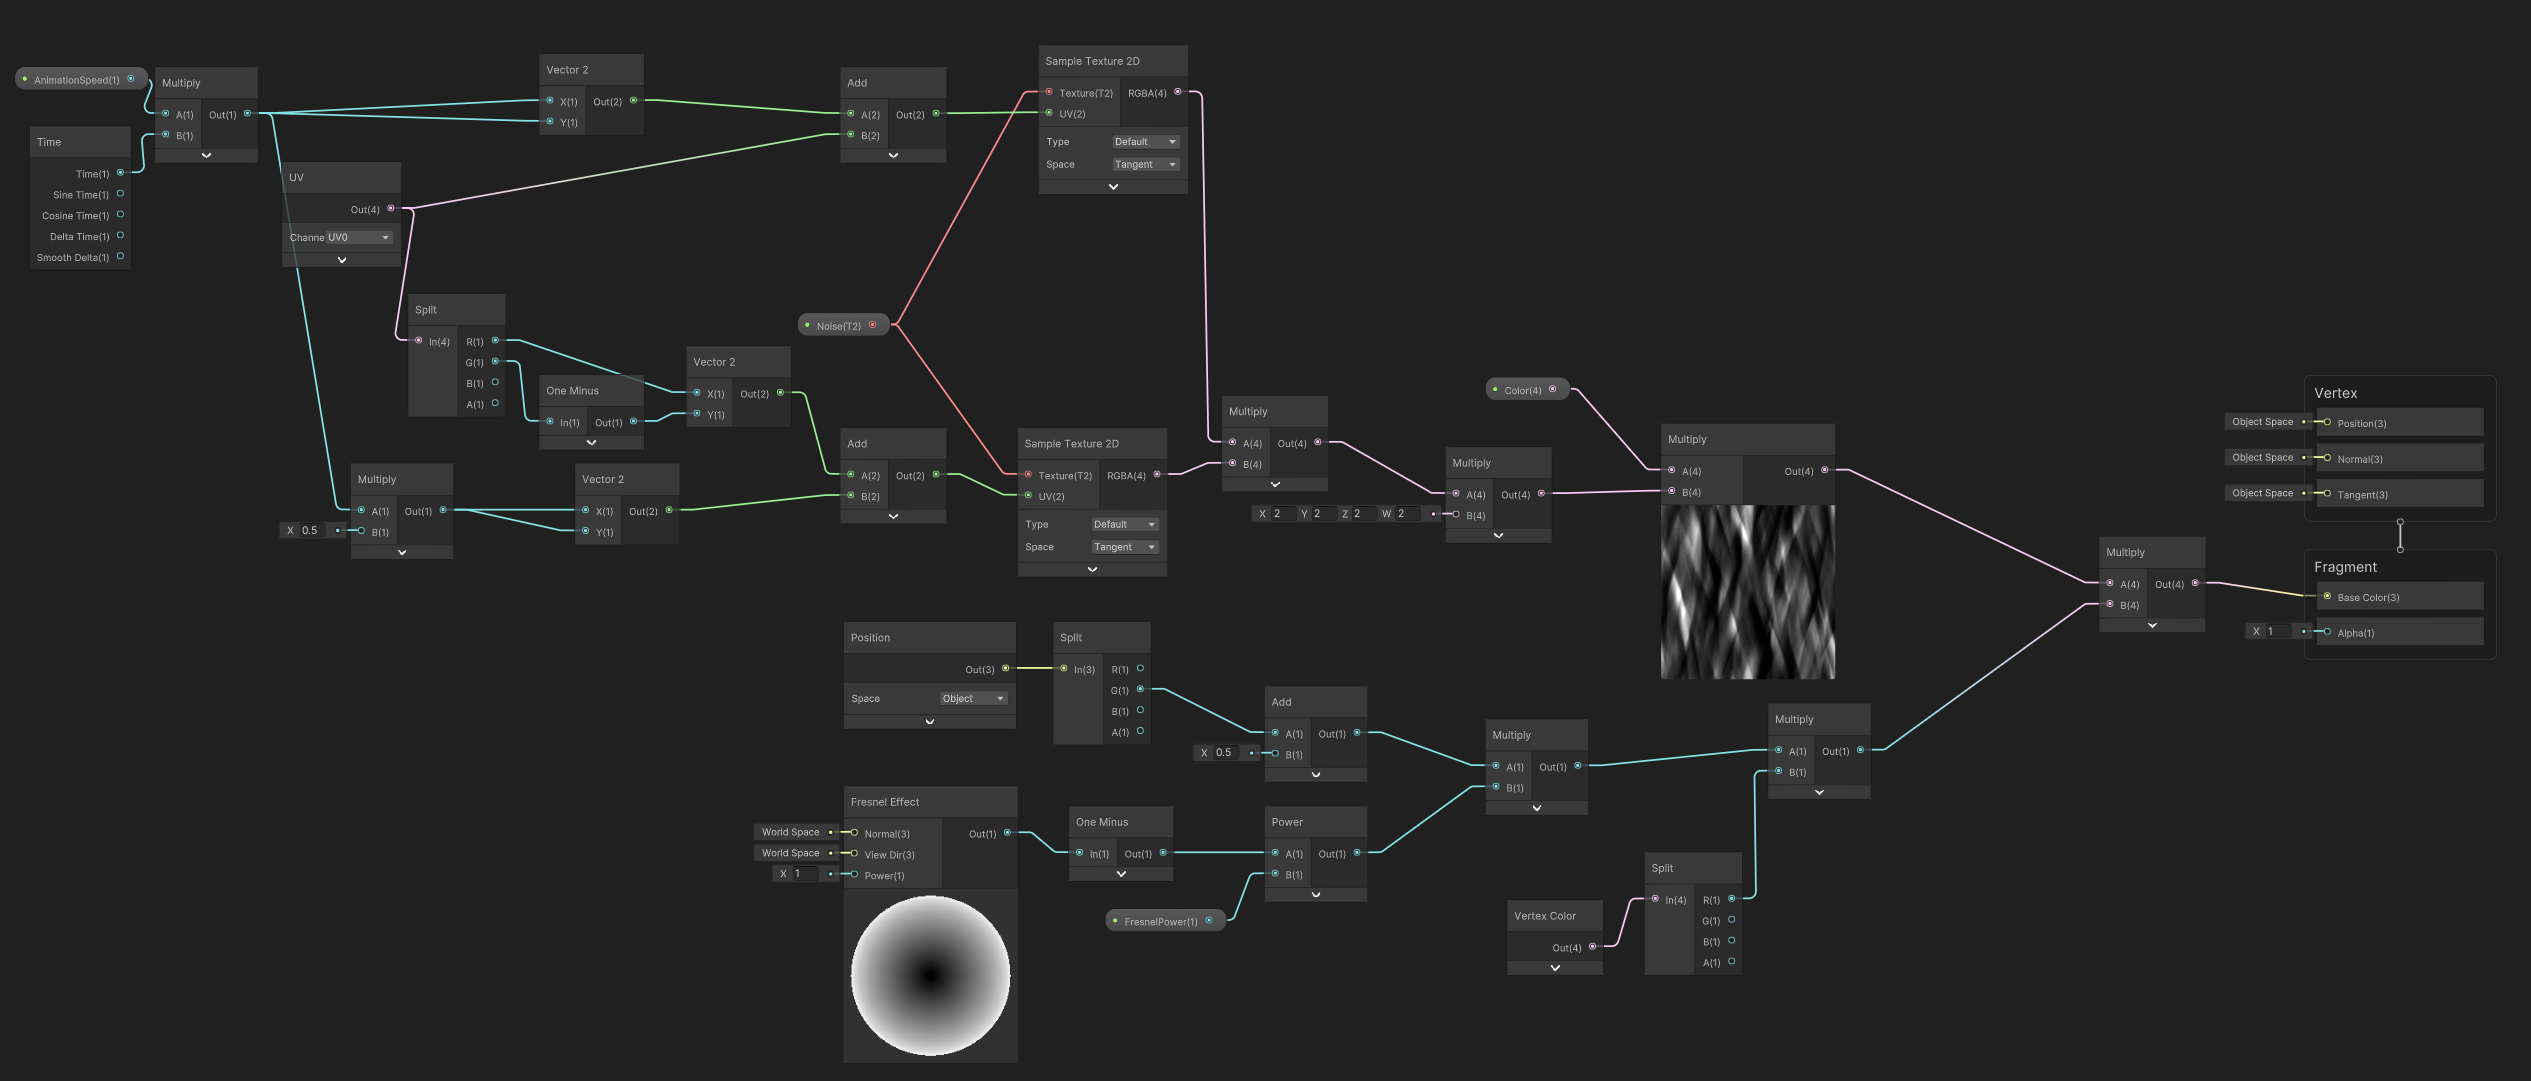
The noise texture looks like this:
The Hole in the Wall
This is mainly achieved in a shader graph that is on the surfaces that need to disappear. We wanted the effect to be coupled with lighting so we needed a way to fetch the light attenuation of real time lights in the scene. Luckily we were using the Universal Render Pipeline (URP) and it's quite easy there.
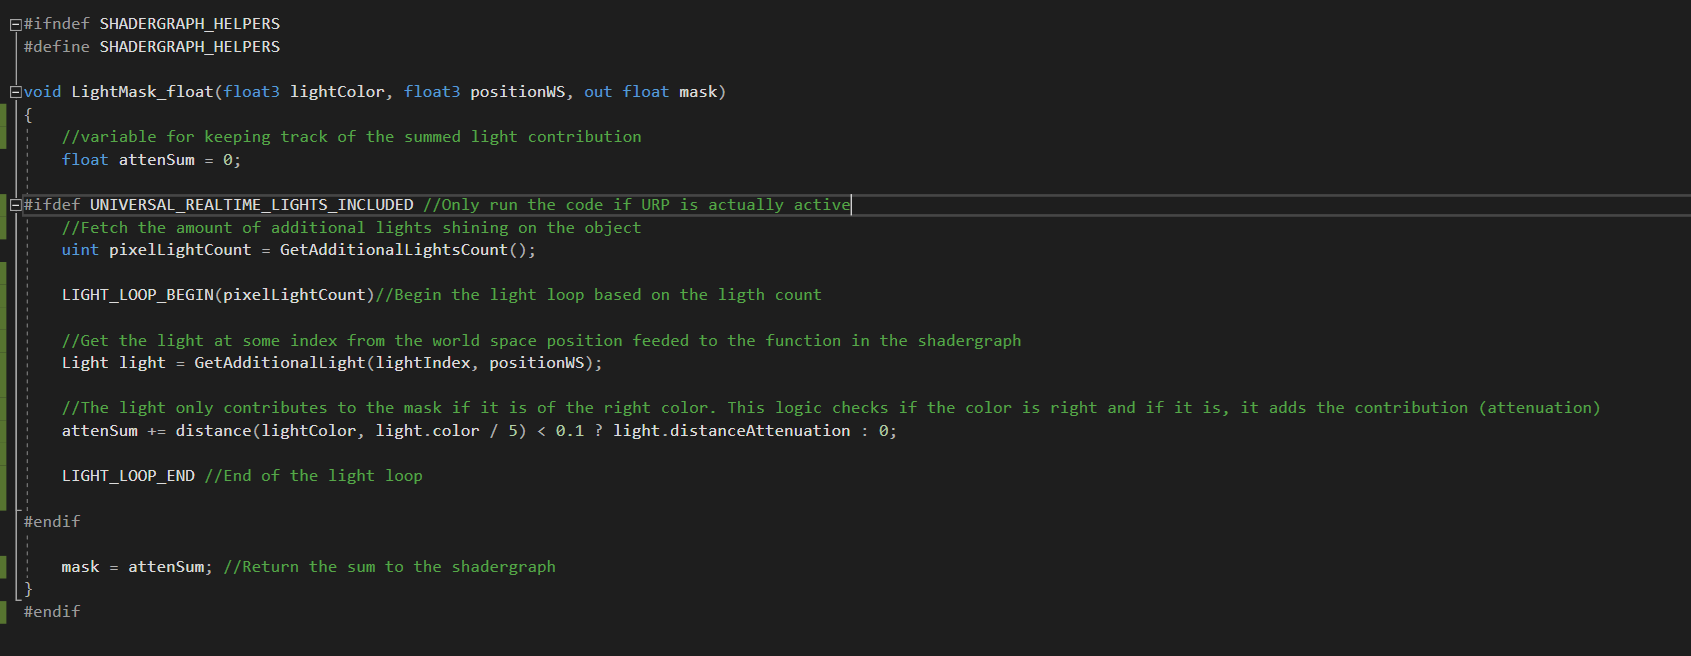
In the project we created a .hlsl file with shader graph helper functions. This is a really cool way to be able to write shader code inside the otherwise codeless shader graphs. I took a look at URPs lit shader and saw that they had set up nice macros for looping through the additional lights. The code can be seen below and is annotated with comments. It returns a float value that basically says how lit a surface is in the current fragment by lights of a specific color.
Connecting the output of the custom function node directly to the color of an unlit shader graph gives this result:
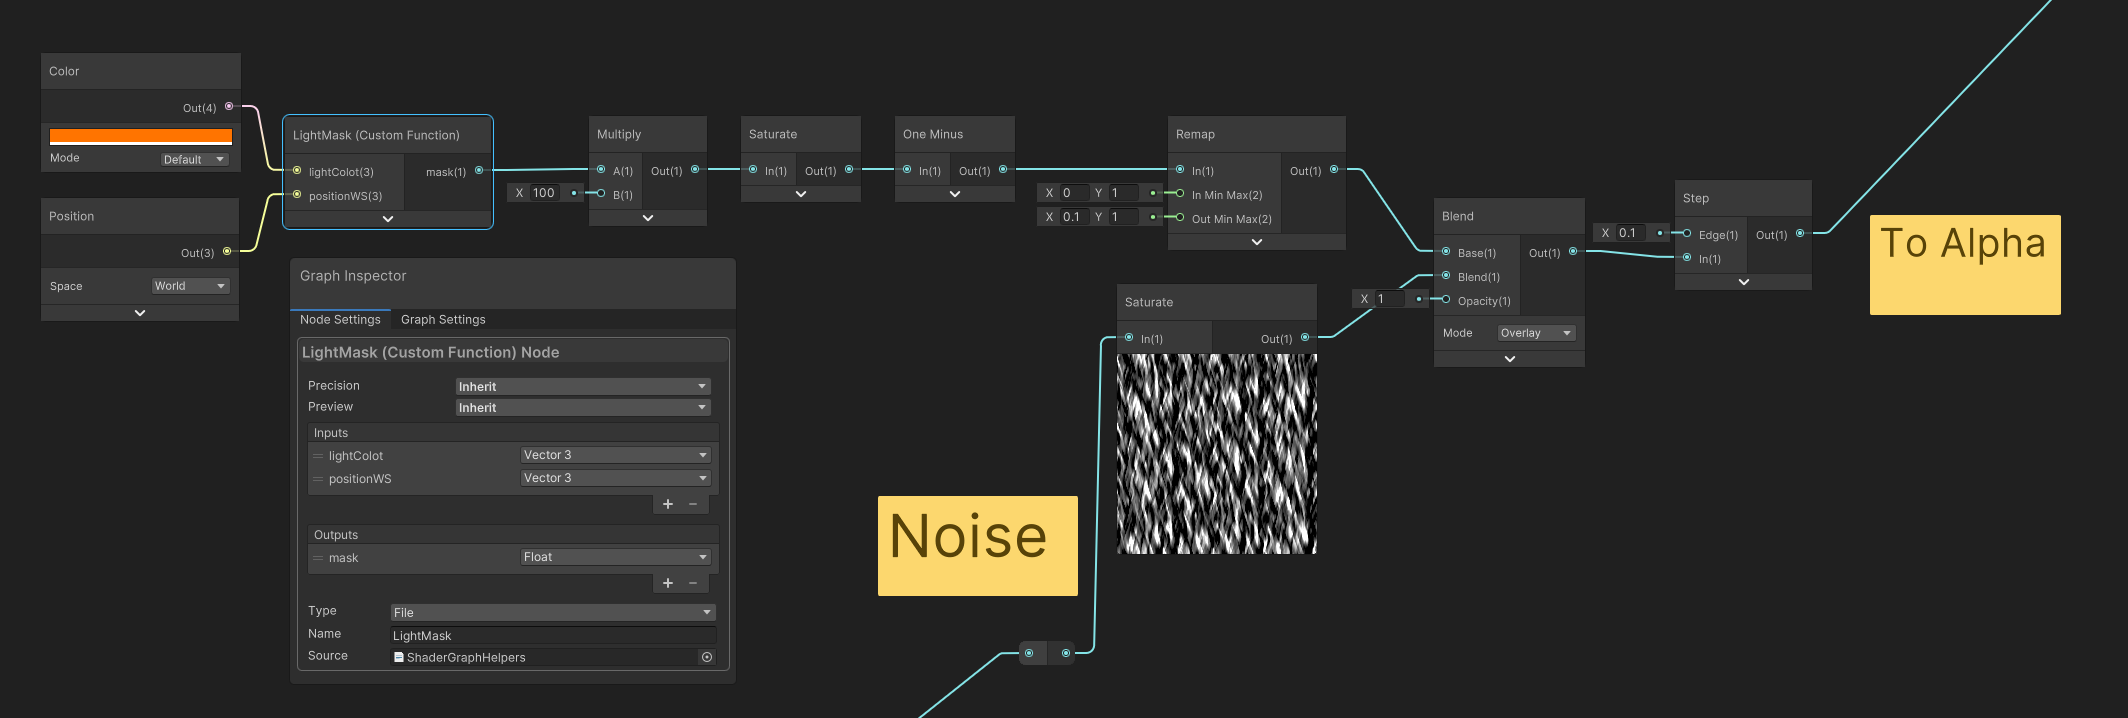
Integrating the function in the graph is fairly simple. We feed it the filtering light color and world space position. We invert the output so that lit areas become black and we adjust it a bit by multiplying, remapping and blending with a screen space noise texture (animating like the one mentioned above). We arrived at these values by simple trial and error. We run it through a step node and feed it into the alpha of the lit shader target which is alpha clipped:
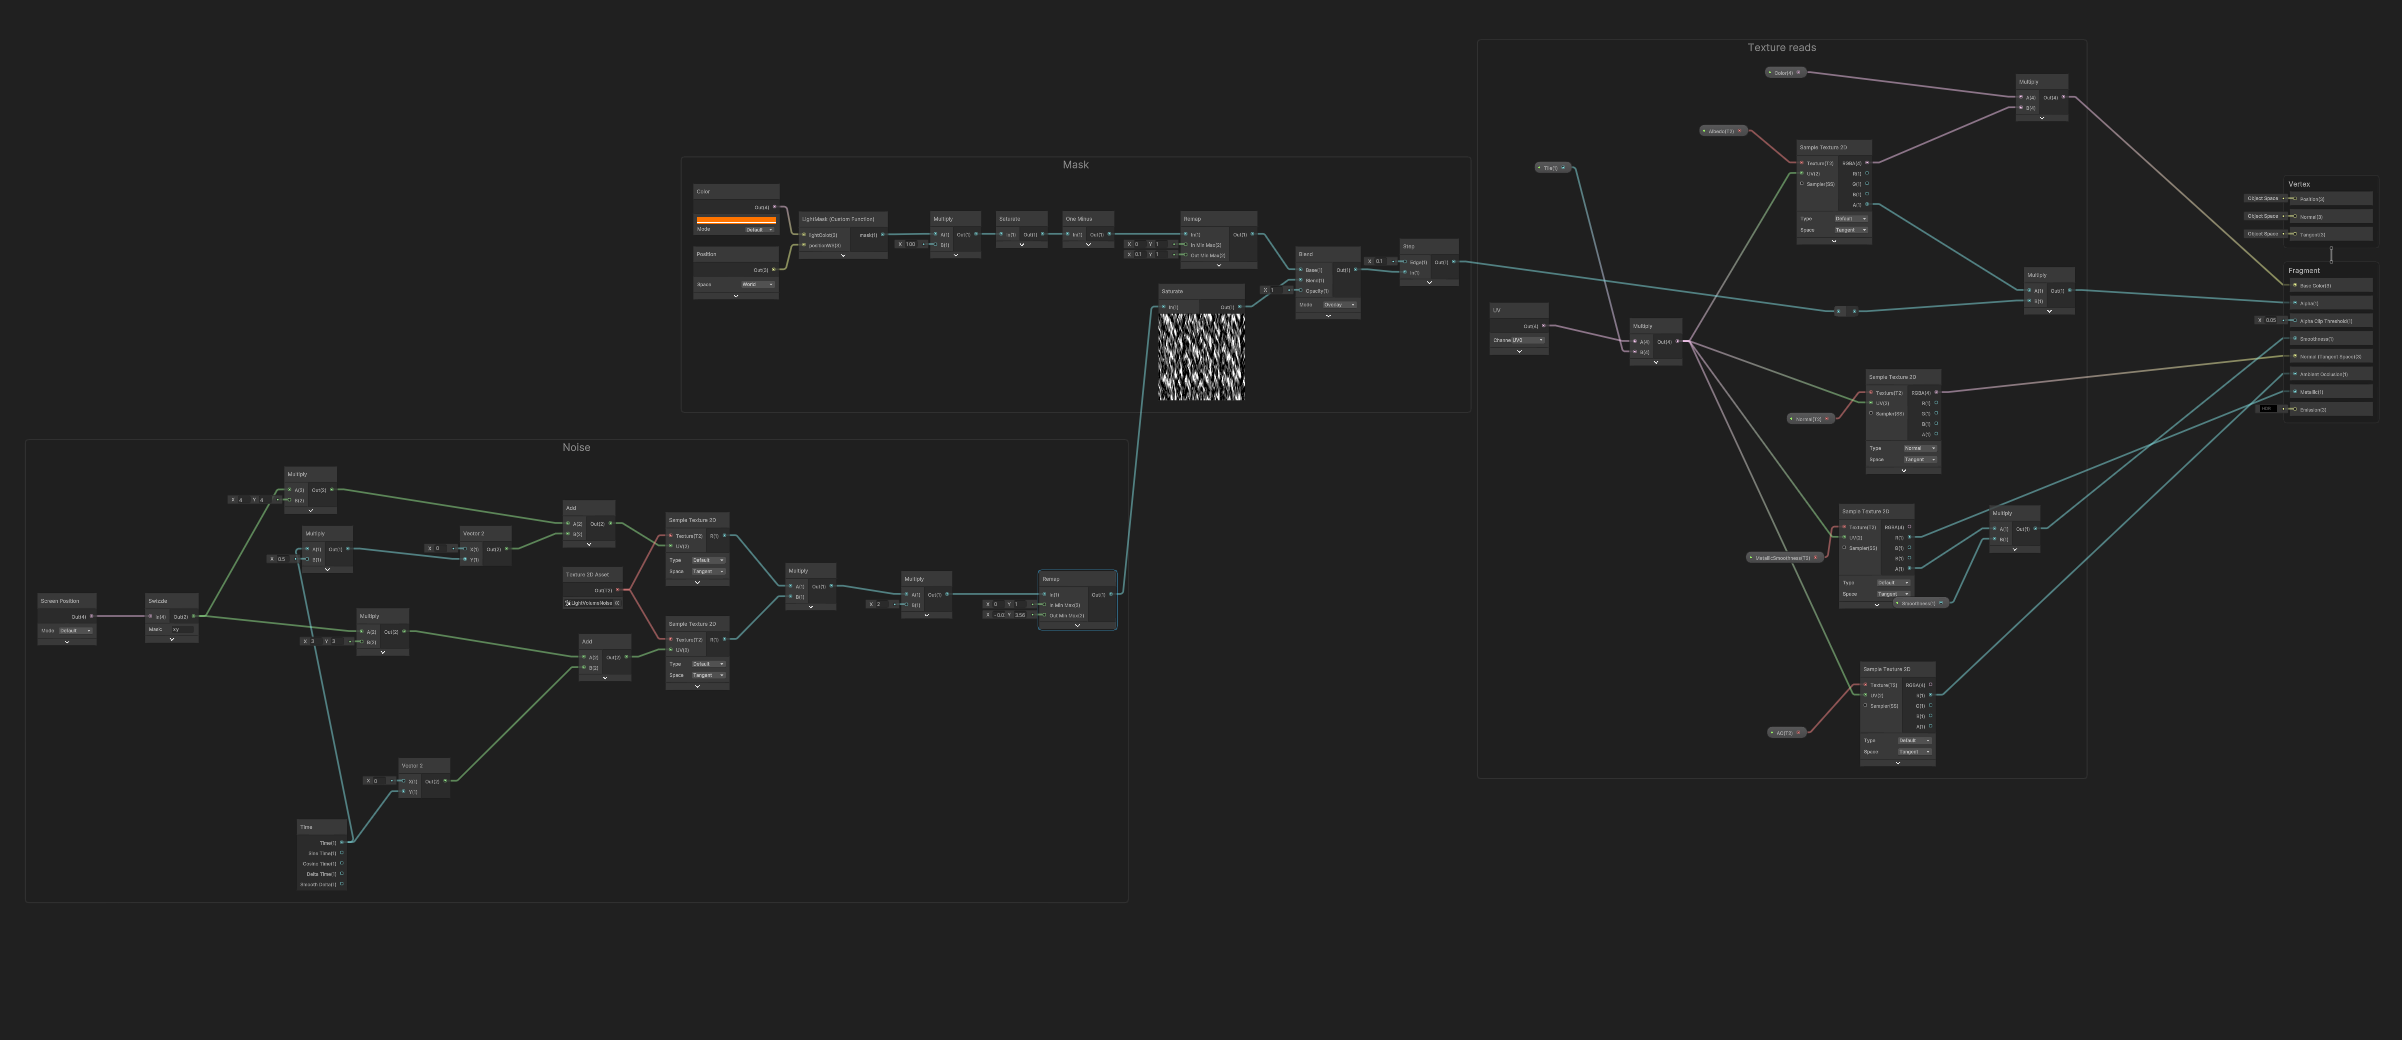
The entire graph is quite big because of the usual texture samples for color, normal etc. and also because it contains the noise texture scroll blending stuff.
And that's it! The final effect looks like this:

Hope that was helpful! :)
Comments
Log in with itch.io to leave a comment.
Inspires me to play with shaders in my next learning session! :-) Well done! And well written article too!
Shader graph is an alien technology. People who can do shader are Aliens for sure